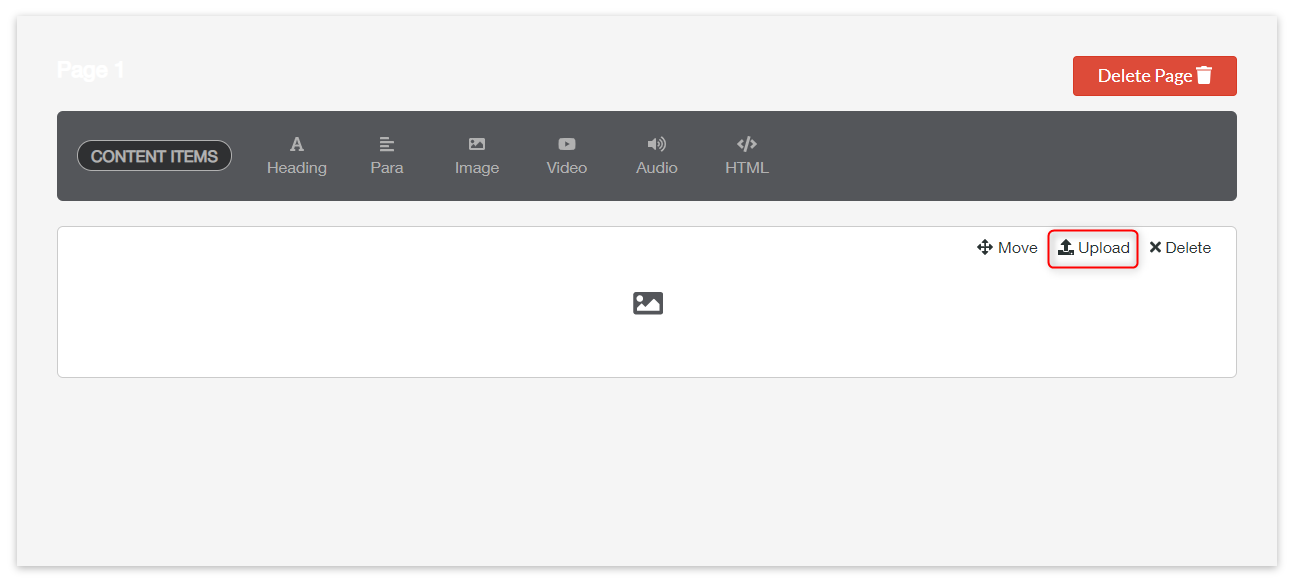
- Once you have created your course you will see a page builder page, this is where you will upload your content.
- You will see a menu bar with different options, click and drag the option labelled ‘Image ’ to the empty space below
- You then need to click ‘upload’ on the new box that has now appeared with an image icon
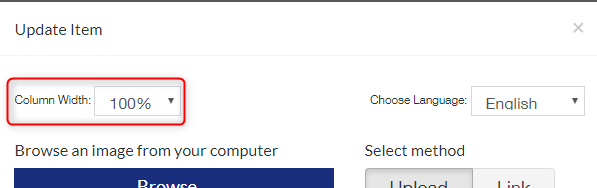
- A little pop up box will appear, here you can upload your image by ether inserting the image URL or uploading an image you already have
- If you want to upload an image from your computer then under Select method you need to make sure that ‘Upload’ is selected, you then see a button appear saying ‘Browse…’ click this it will then allow you to select a pre saved image on your computer.

- To upload an image via URL you need to make sure that under Select method the box ‘Link’ is selected, you then need to paste the URL link into the ‘Paste Your Image URL Below’.

- You can also select if you want the image to take up 100% of the page width or only 50% under ‘Column Width’.
- Once happy with your image choices click ‘Save’ you will now see your image.
How to add an image Print
Modified on: Wed, 2 Dec, 2020 at 9:17 AM
Did you find it helpful? Yes No
Send feedbackSorry we couldn't be helpful. Help us improve this article with your feedback.